Daily Farm Routes
This is the recommended and optimized path for daily overworld farming in Honkai: Star Rail. It is optimized for Acheron but works for other characters too.
- As of V2.3 and EQ6, you can receive ~130* stamina worth of rewards in the form of character exp and credits - and this doesn't even factor in ascension and crafting material
- ~121k in EXP for every non-max leveled character on the team
- ~76k in credits
- *(The range in total stamina rewards is based on the number of Trotters appearing in battles).
- A list of all enemies can be found on Regis' database here.
Read before scrolling down!
- This route should take you around 50~ minutes.
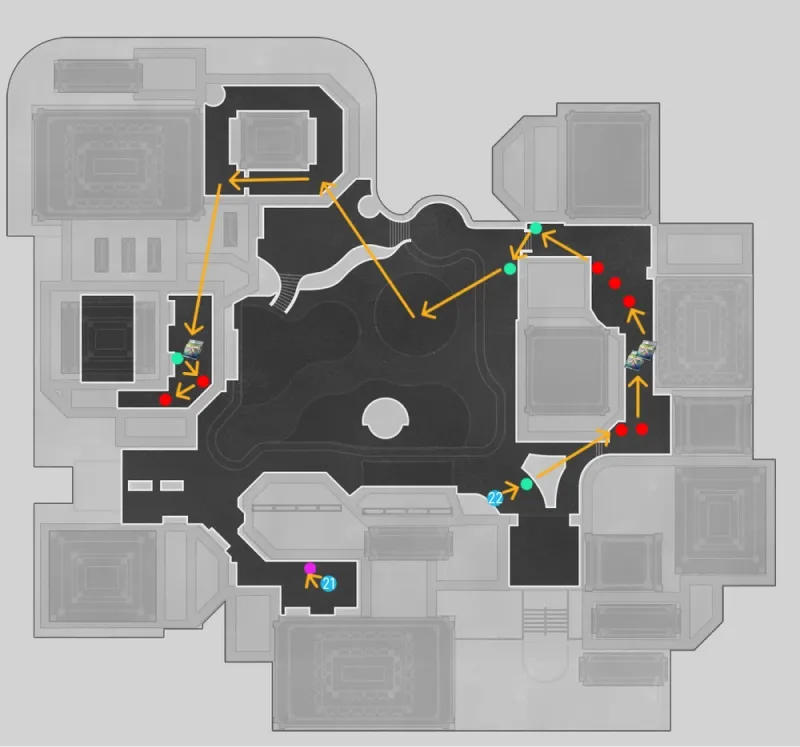
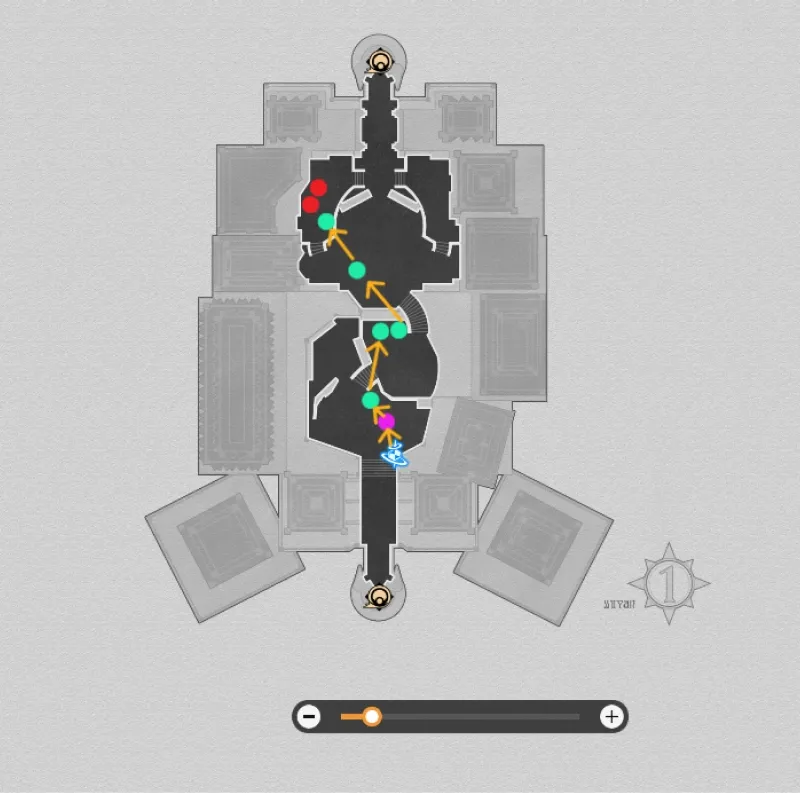
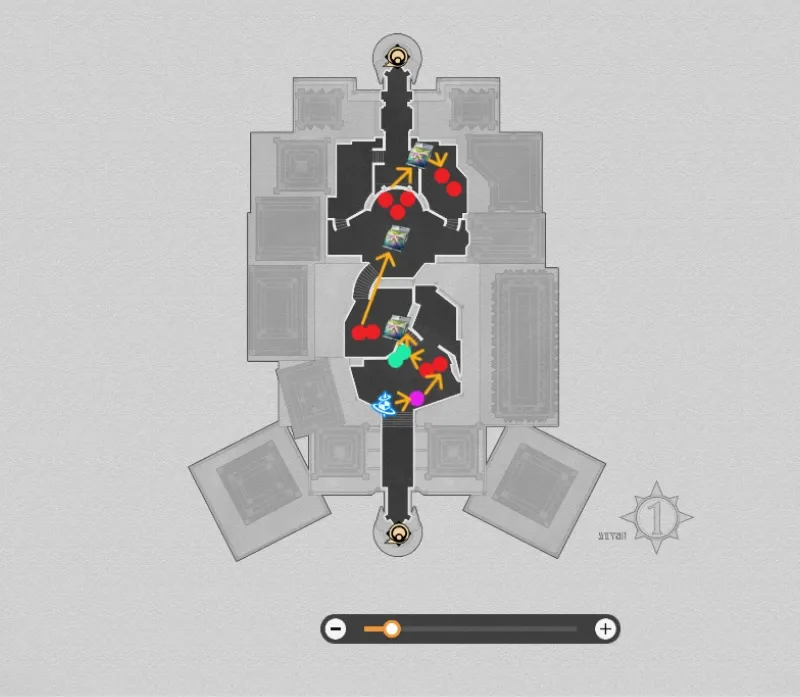
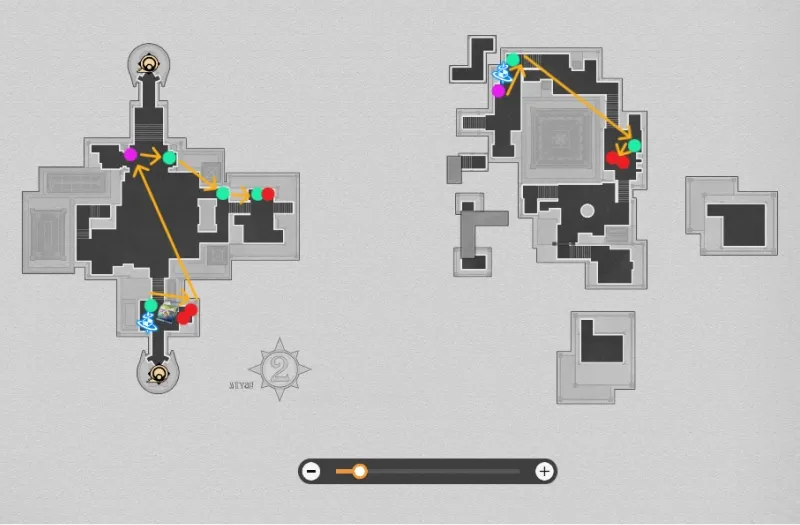
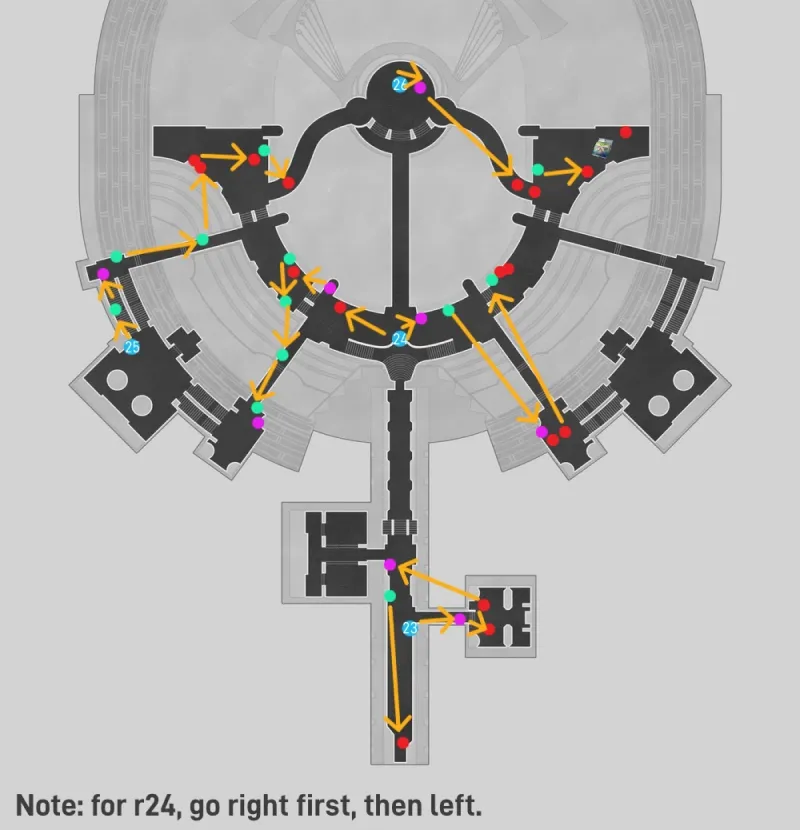
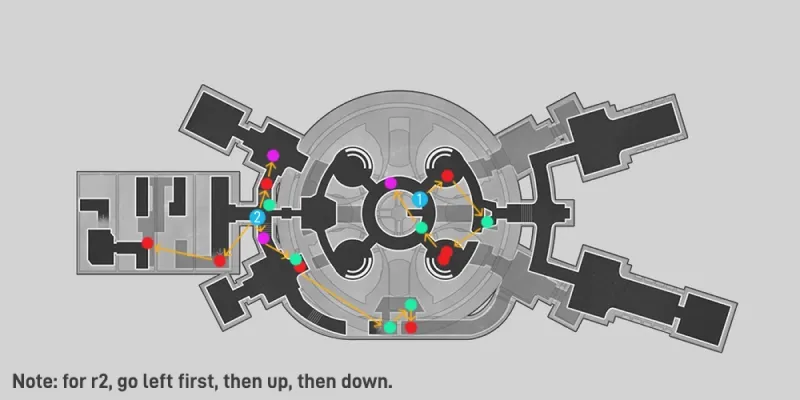
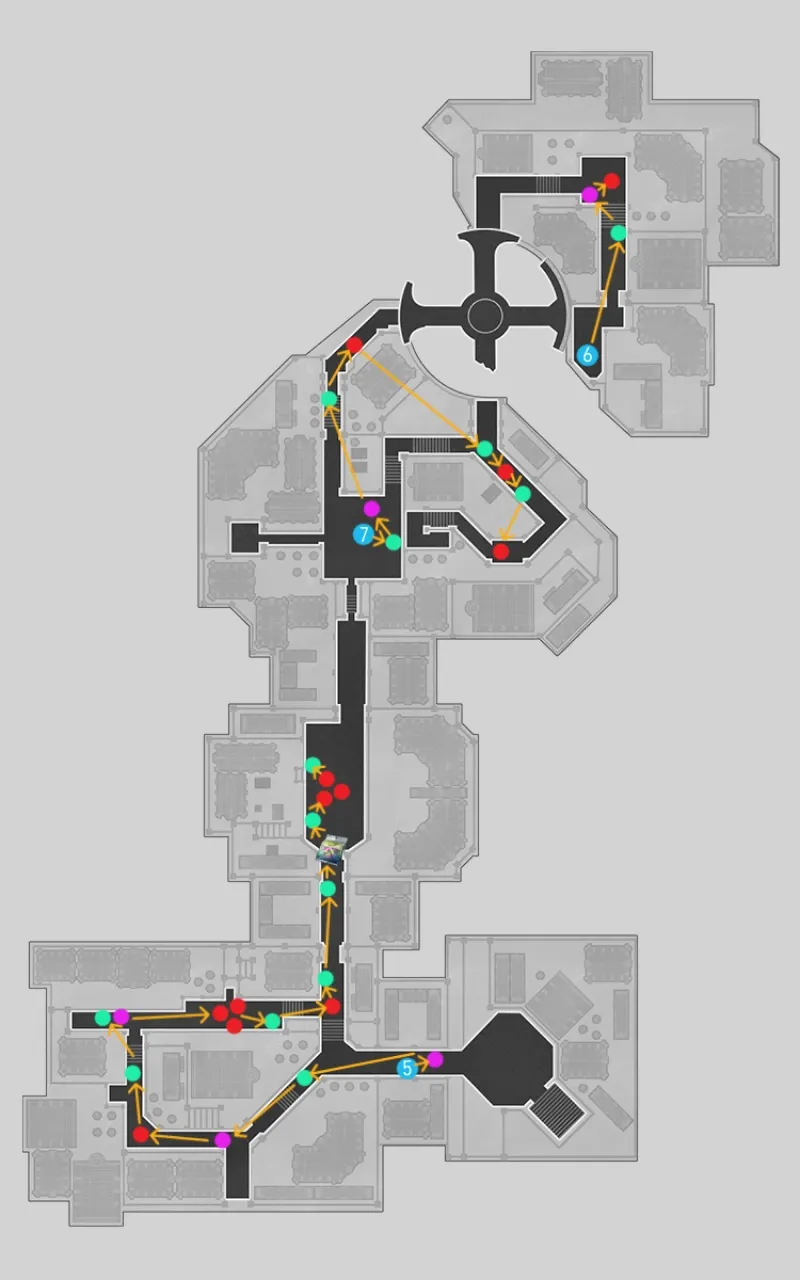
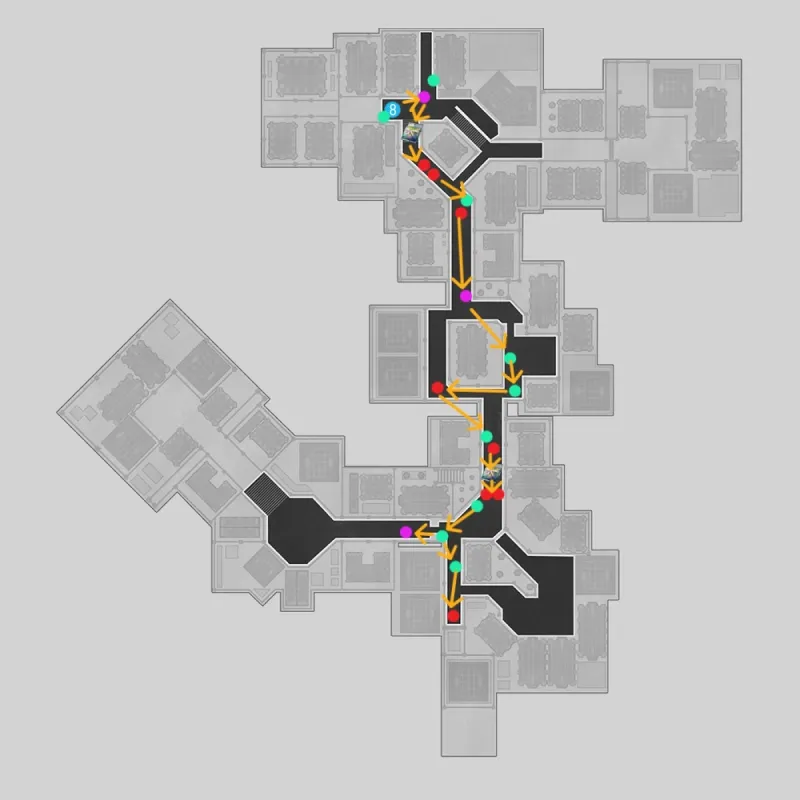
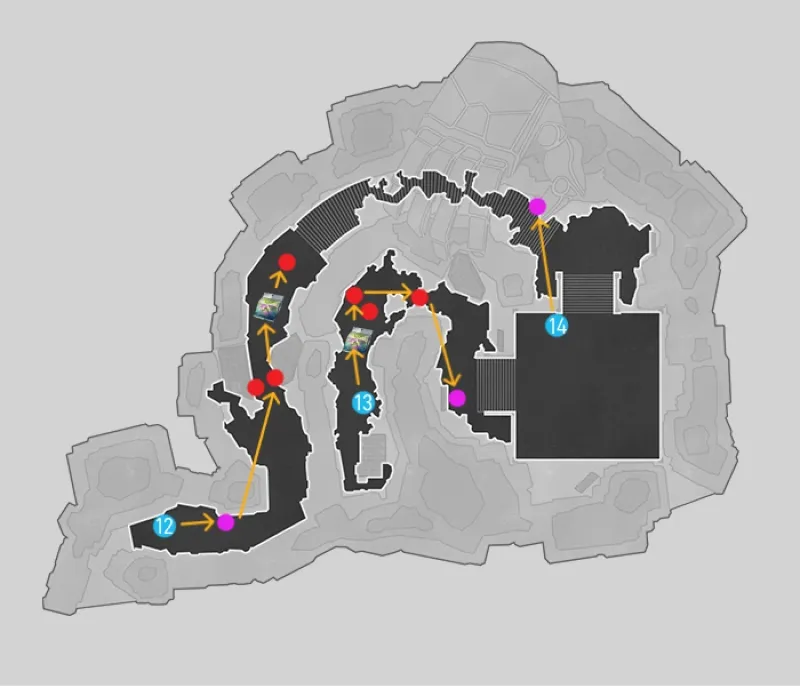
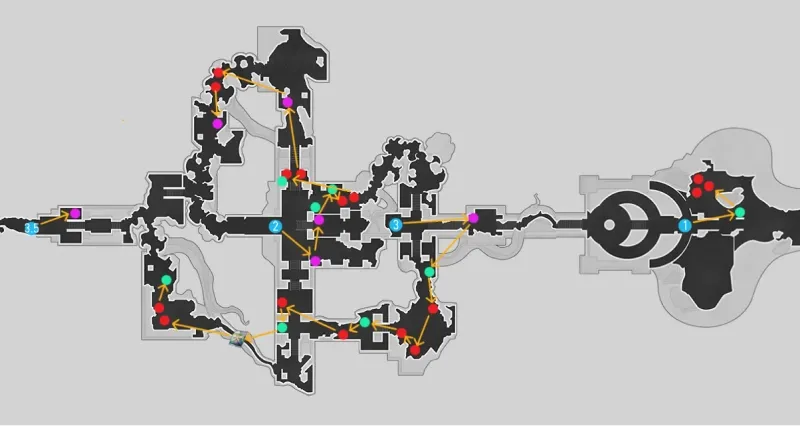
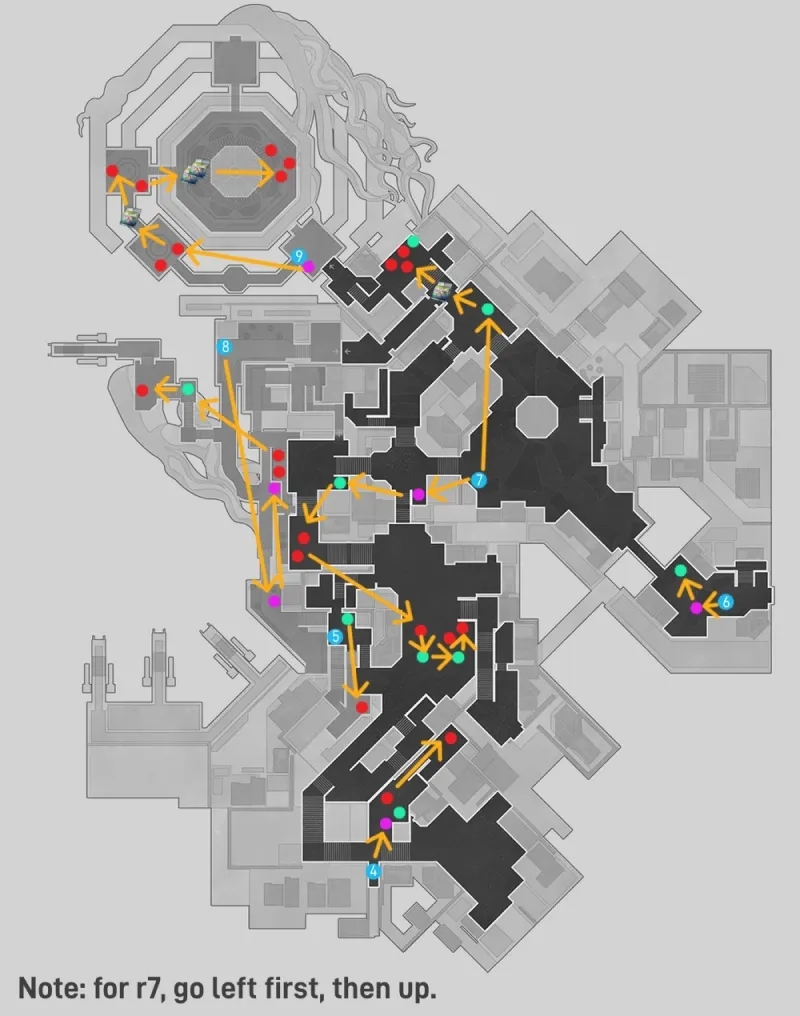
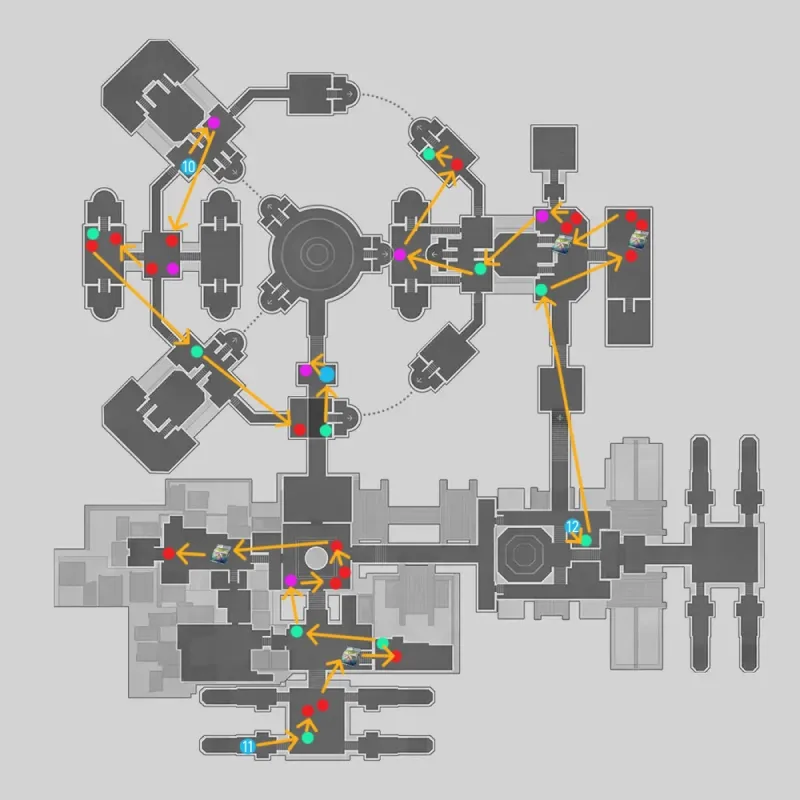
- You need to pass through every single dot (apart from regular barrels) on the map, even if the arrows don't point directly at each one. If a dot is in your way, break or defeat it.
- Most enemies are marked, apart from some penacony 3D areas that are too time consuming to reach.
- Make sure you follow the numbers inside the waypoints! These numbers consider the technique points you'll gain from breaking objects along the way. Also take a good look at the map first so you don't start from the wrong waypoint.
- Start with 5 technique points. Try to avoid breaking any barrels that’s inside the route.
- Instead of constantly opening your inventory, press "E" when your technique points reach 0. You can quickly consume a Trick Snack this way.
- Use a Trick Snack whenever you see its icon on the route.
- This route assumes you're starting at the Space Station and ending at Penacony. You can adjust it for other starting points by matching your starting technique points to the corresponding region on the guide.
- You can buy Trick Snack materials from the Grocery Stand in Xianzhou. Additionally, you can get 25 of each material daily by completing the daily assignment.
- The entire route requires a total of 65 Trick Snacks (TS).
- Topaz does not trigger bonus credits with Acheron technique.
- Contact on Discord (@notchhell) if you find anything off.

Space Station (Start with 5 Technique Points)
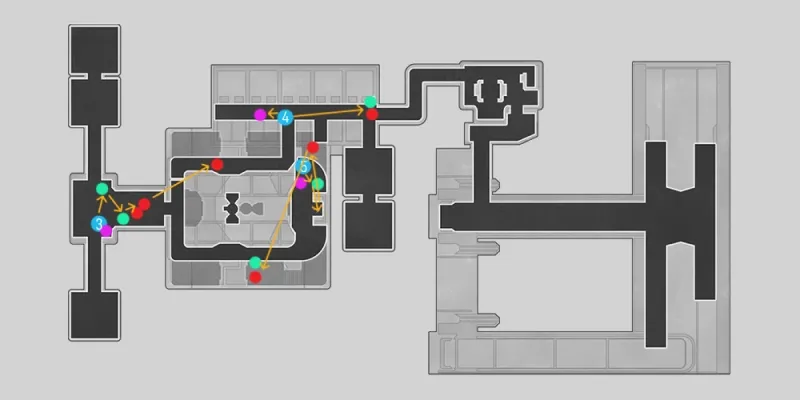


Jarilo-VI (Start with 5 Technique Points)

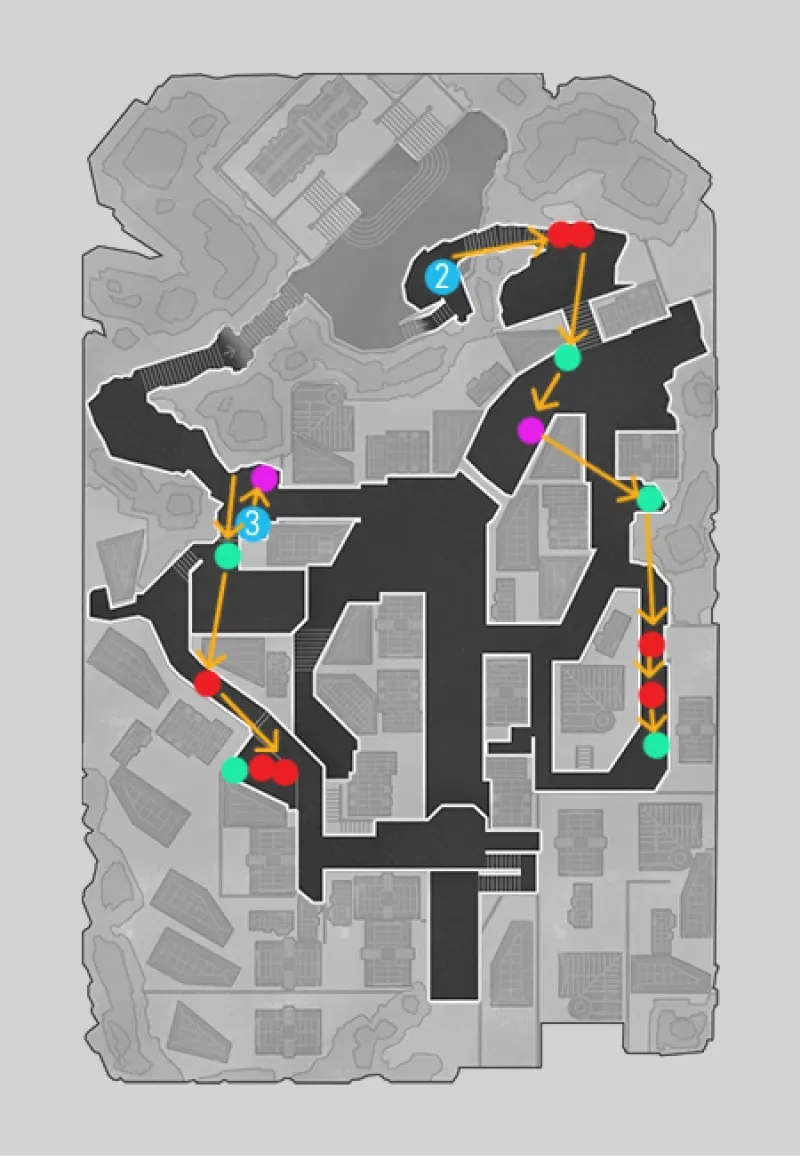
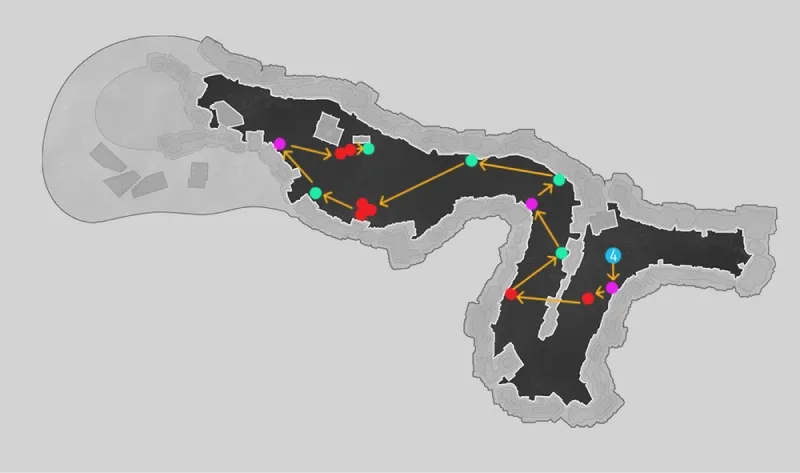
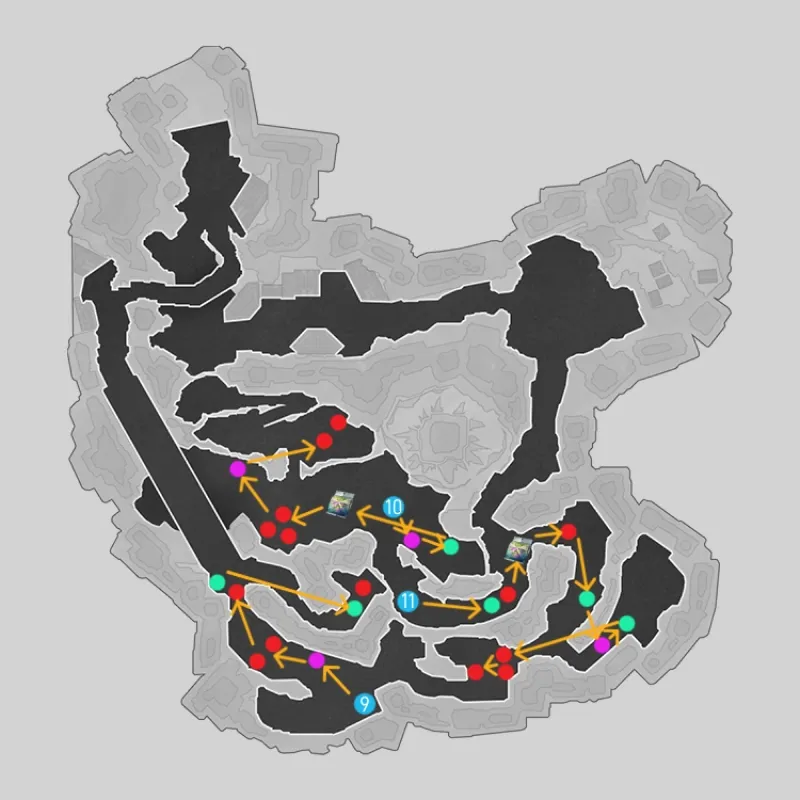
Xianzhou Luofu (Start with 4 Technique Points)
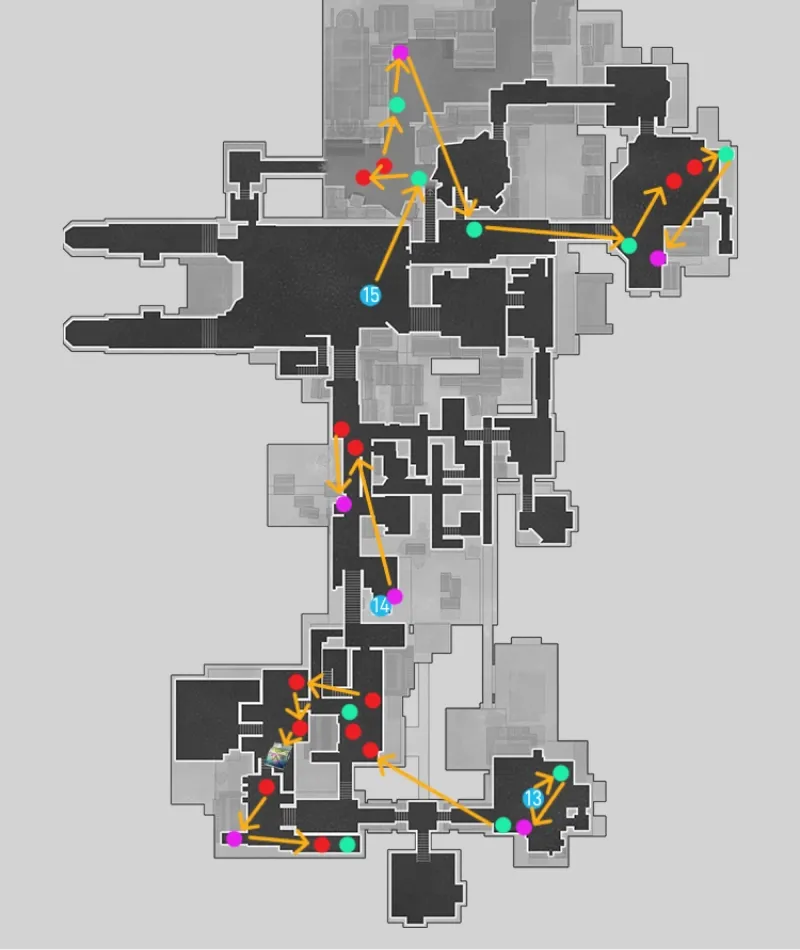
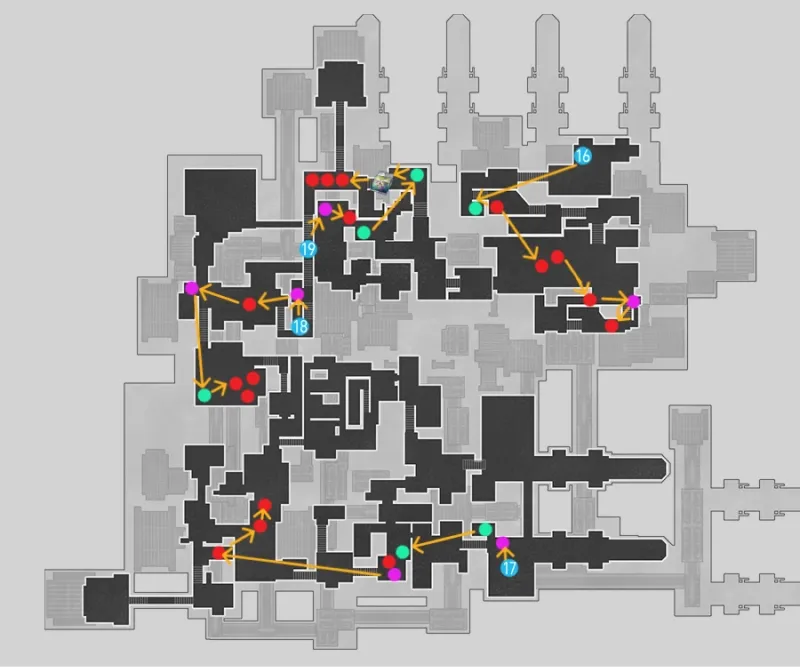

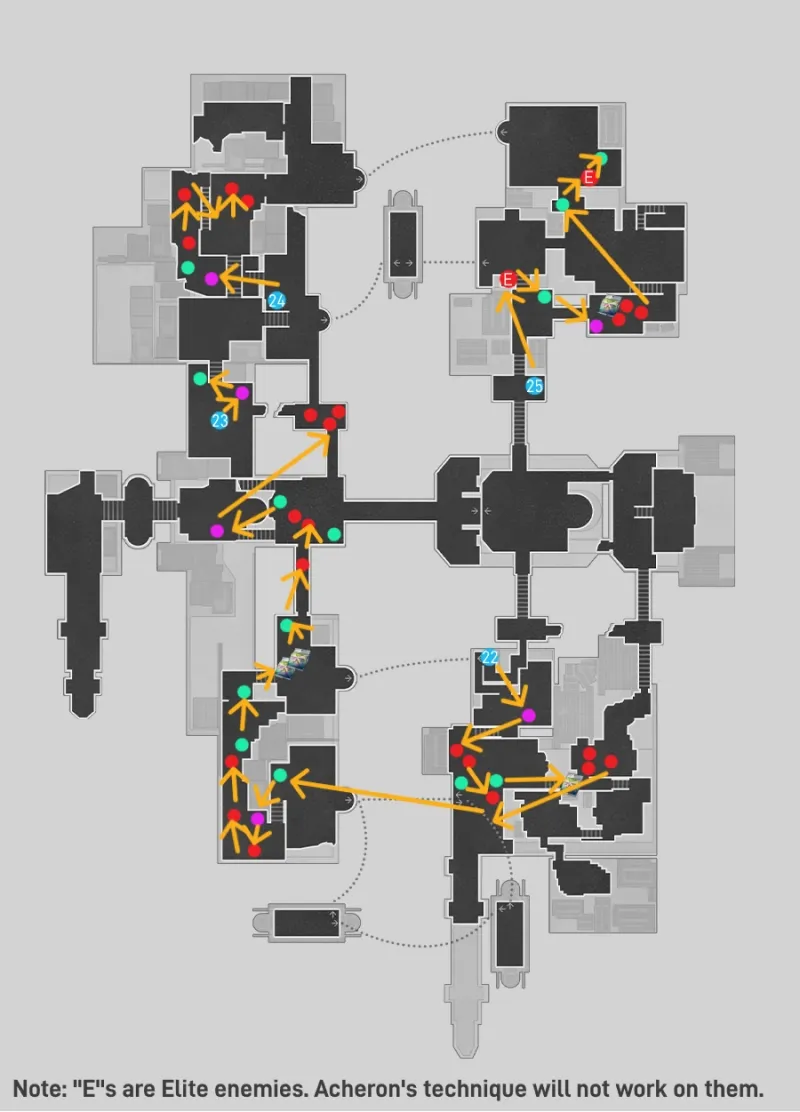
Penacony (Start with 1 Technique Point)
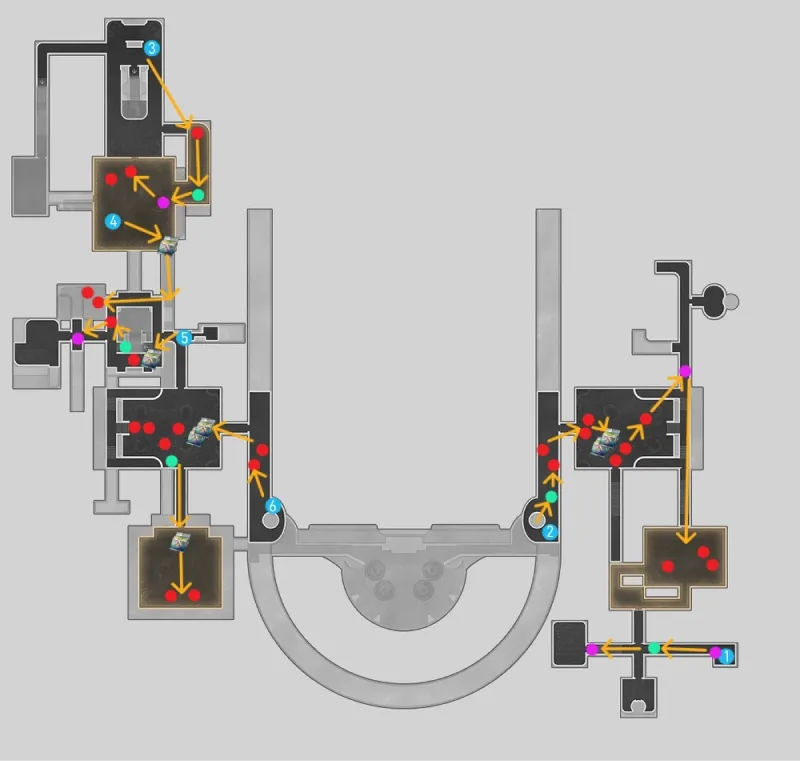
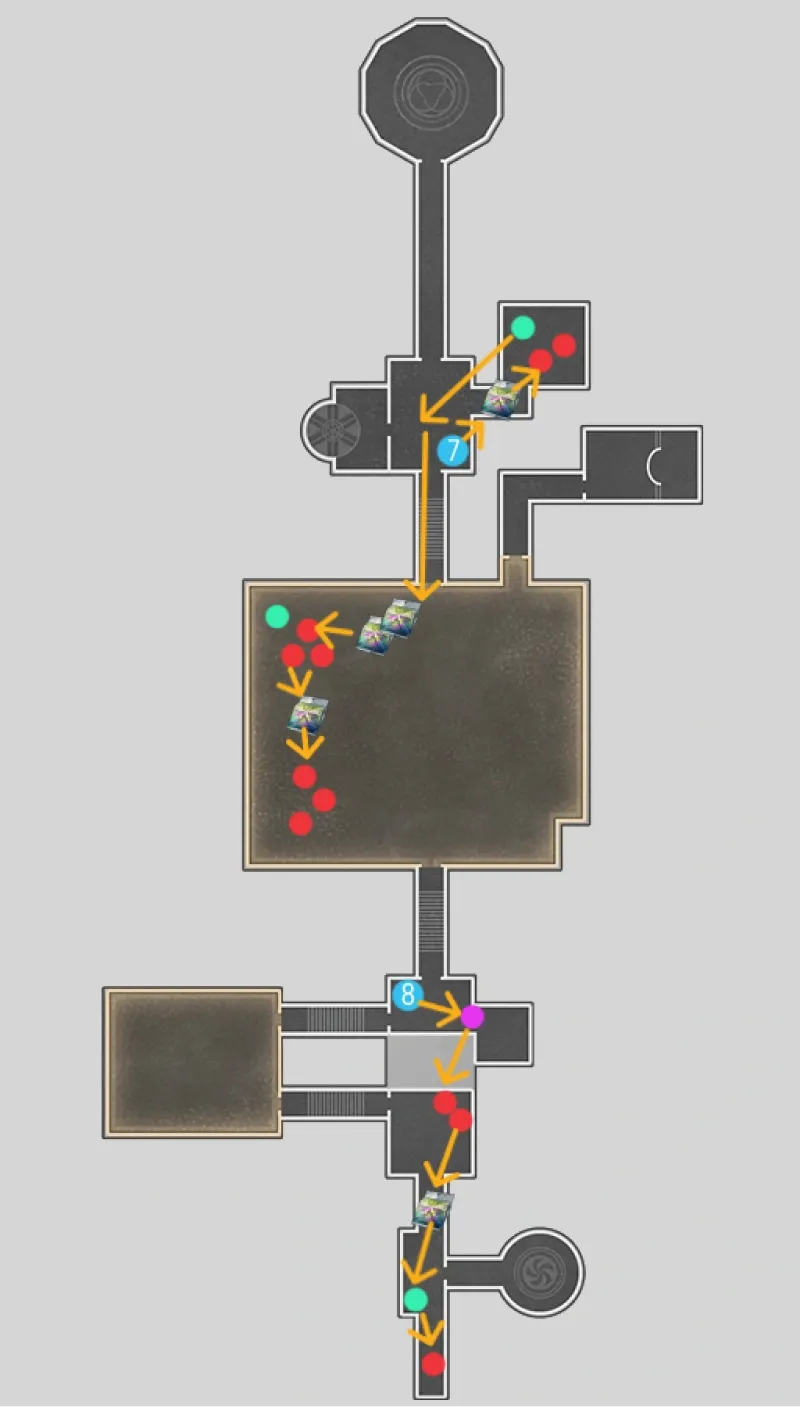

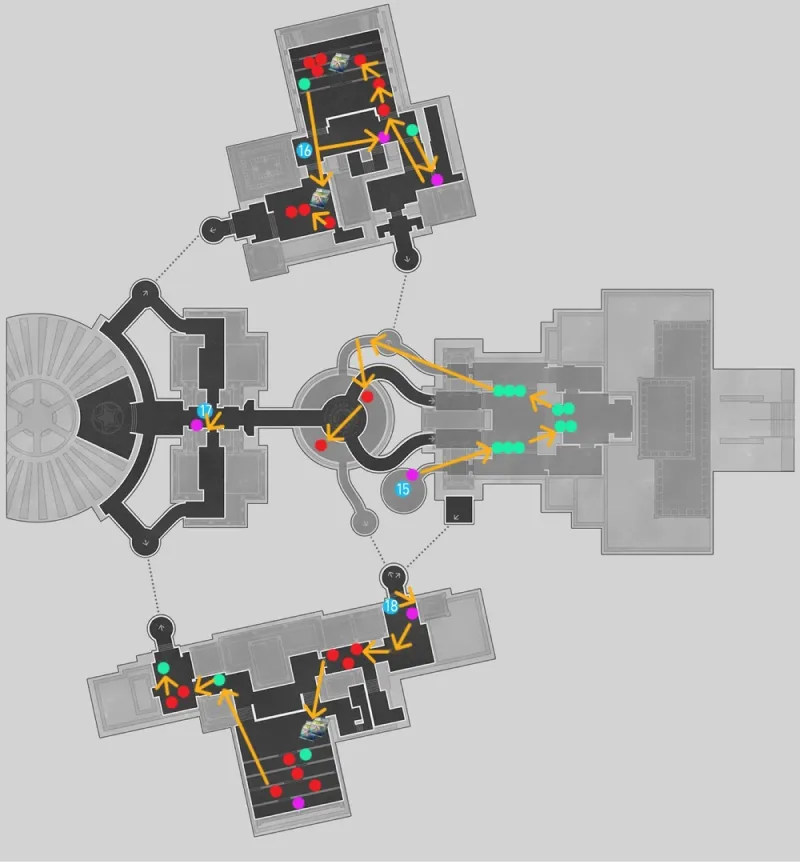
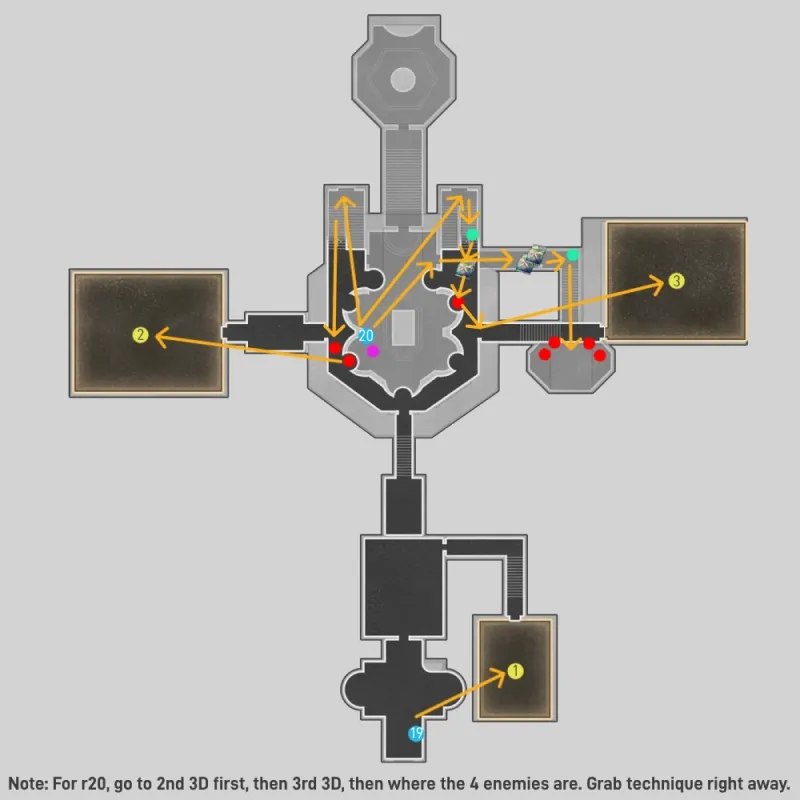
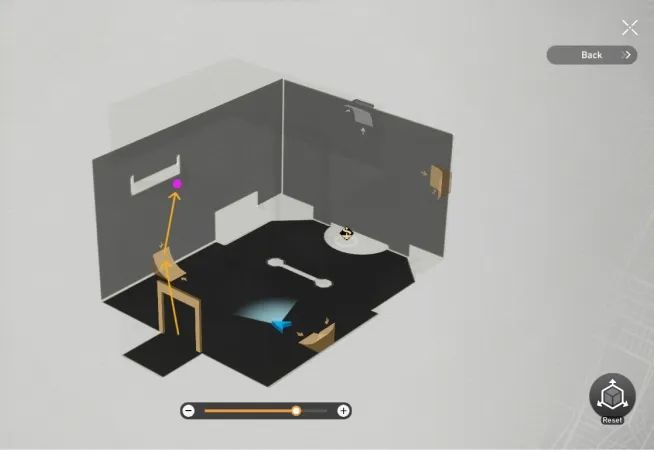
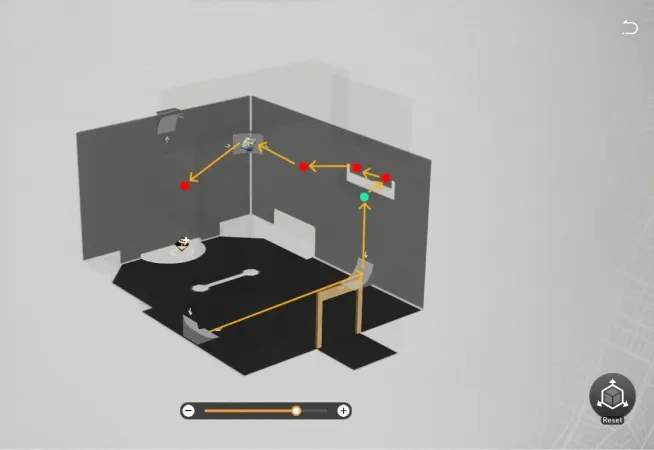
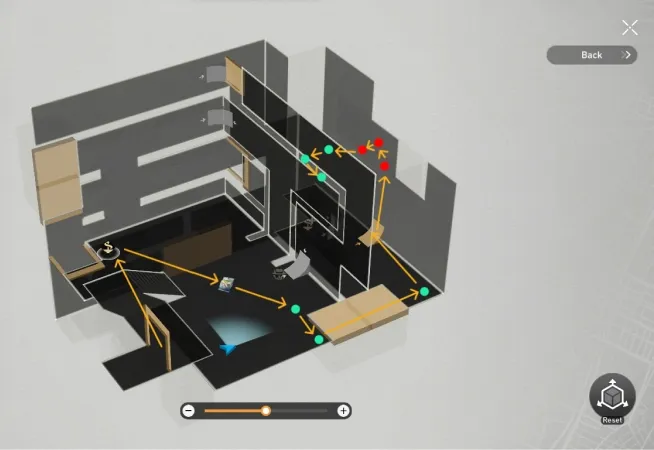
Dewlight Pavilion 3D Map
Note: All maps are from the perspective of when you enter the room.
